|
|
 |
|
|
|
|

|
|
|
|
|
|
Various
Lighting Methods
|
|
|
|
|
|
Method 1:
Natural Light
The benefit to natural light is that it requires no
special equipment. Its already there, set up and waiting for
you to use it. The drawback is that unless you have very
good friends in very high places, or very specialized
equipment and a lot of help, you have absolutely no control
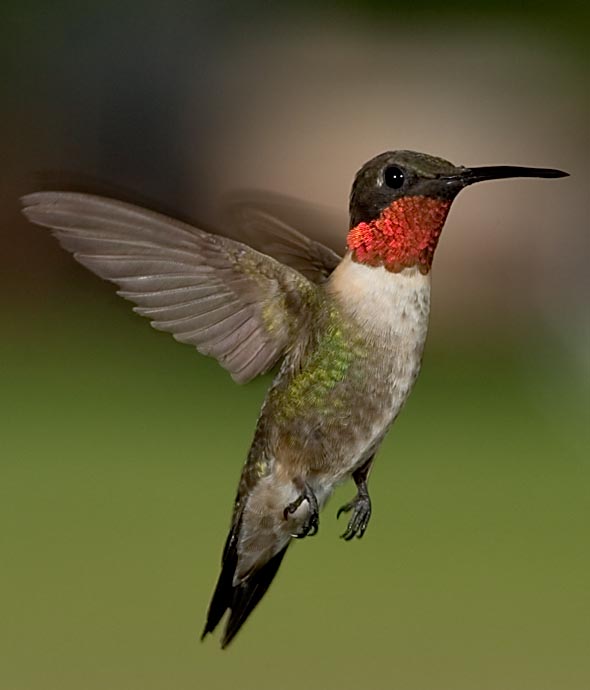
over it. Use natural light for perched birds. Use direct
sunlight for flying birds. Make sure the sun is behind you
in direct sunlight.
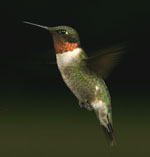
1/500 shutter speed, late afternoon sun
You aren't going to freeze the wings
effectively with a fast shutter speed and get a good image.
You will either end up using a high ISO and get a noisy
image or your image will be too dark and in any event your
shutter speed just isn't fast enough, even if it is 1/8000
second. So, when using direct sunlight, lower your ISO, use
a 1/500 to 1/1000shutter speed and be satisfied with the
results or get a good flash unit that syncs with your camera
at high shutter speeds.
One of the things you may notice is that the
wings may end up so blurry that they are basically invisible
as in the shot below:

Look Ma, no wings! Shutter 1/500, late
afternoon sun.
Just chalk the shot up to bad luck and keep
shooting. With this subject, no matter the lighting method,
you will end up with plenty throw away shots. I
admit that my failure to frequently use only natural light has to do
with depth of field. If you can live with only the head in
focus, you can use a larger aperture, let more light get to
the sensor and get some perfectly acceptable images. But if
you want the whole bird in focus consistently and want to
freeze the wings, you are going to need flash in one
configuration or another, because you will need to use
smaller apertures.
|
|
Method 2: On-Camera,
Hot Shoe Flash
The benefit of a hot shoe flash versus the other flash
methods is portability. The
drawback is specular highlights. When used as fill flash in
combination with sunlight or strong ambient light such as in
the shade of an upright object (i.e., open to the sky) or
bright overcast conditions, the specular highlights will not
be as noticeable, such as in the following image:
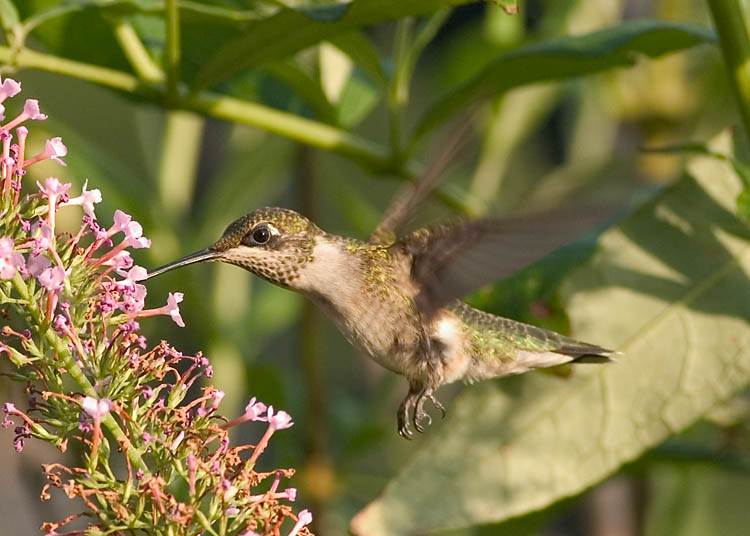
Hummingbird in the shade of a house in
mid-afternoon.
Notice that the gold highlights are still
there. These off-color highlights will consistently be shown
when using on-camera flash.
The primary reason to use on-camera flash is
to gain additional Depth of Field. If you can gain one or
two stops by using flash, you can close the aperture to f/11
or f/16 and still properly expose a bird that is shaded from
the sun. This will allow most, if not all, of the bird to be
in focus.
|
|
Method 3:
Off-Camera Flash - Small Area
The classic multiple-flashes-around-the-feeder method of
shooting birds falls into this category, though only one
off-camera flash is necessary. The benefit is optimum,
controlled lighting conditions that allow shooting at f/11 or
f/16 and give good DOF. The drawback is that you can
only shoot hummingbirds at one fairly small location.
Some sites suggest placing your feeder among flowers for
this method. Actually placing nectar in flowers works too. It
is possible to get birds feeding at flowers with this method,
though a feeder will likely be a more consistent hummingbird
draw.
In any event, this is the method that is going to produce
the wow shots.
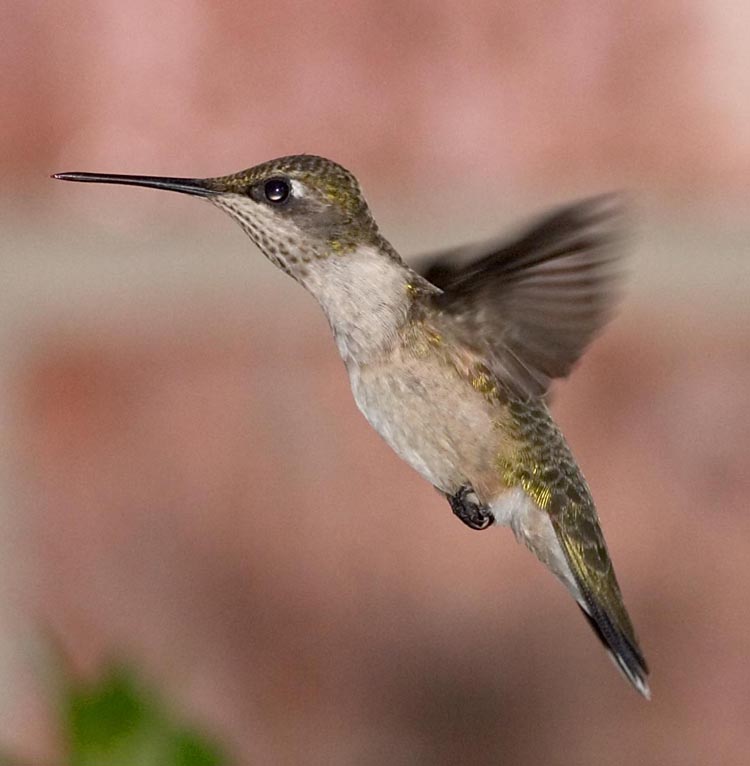
Two hot-shoe flashes diffused with
umbrellas.
Two Hot-Shoe Flashes, no diffusers. Notice
the more "shiny" look and gray areas.
Notice that the wings are not frozen in the
first image above. Though this is the method to use if you want to
freeze wings, frozen wings are not a requirement. Notice also
that the background is a simple gradient caused by an out of
focus yard with dark trees in the distance. Creative placement
of the feeder or simply putting a plant, a bush or some
flowers and having one flash that illuminates the background
can give a more pleasant effect.
|
|
|
Method 4:
Off-Camera Flash - Large Area
This is how I go about getting photos
of hummers feeding at flowers. This method involves the
placement of as many off camera flashes as you have around a
consistent hummingbird draw like a hummingbird garden, mimosa
tree, butterfly bush, etc. Unlike the small-area method, you are
flashing a relatively large area like the side of a tree or a
whole hummingbird garden. Instead of the bird being no more
than 18 inches from your flash units, the bird may be 5-15
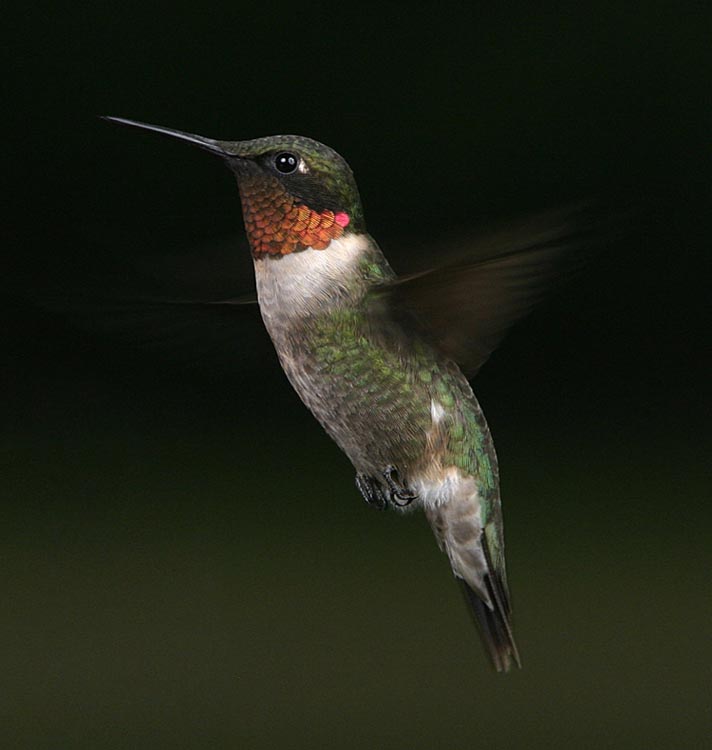
feet away. In late evening when my hummingbird garden was in the shade, I took the following shot using four (4) Vivitar
283 flash units sync'ed with pc sync cords:

Hummingbird eating at Butterfly Bush
Of course, there are tricks to narrowing the
hummingbird's feeding focus or getting him to stay longer at one
flower that are discussed in my Tips and Tricks section.
With this method, the use of diffusers is
impractical since you need as much light output as possible.
Notice the gold highlights in the above photo due to the small
angle of the non-diffused, distant flashes. However, when
trying to capture a hummingbird that is feeding, it is a good
idea to keep in mind that the flower is also a very important
part of the image and people will forgive less than perfect
colors on the bird.
|
|
|
Combinations
Aside from combining flash with sunlight which has already
been discussed, I have seen shots where on-camera flash is
combined with off-camera flash. This provides a simple way of
sync'ing the flash units with optical slaves triggered by the
on camera flash. It also de-emphasizes the specular highlights
created by the on-camera flash by illuminating the bird from
other angles while not eliminating the specular highlights
altogether.
|
|
|
|
|
|
|
|
|
|
|
|
|
|
|
|
|
|
|
|
|
|
|
|
|
|
| |
|
|
|